Prev Next
Edit this page to change styles
--- Boxes and outlines ---
--- Headers beyond ordinary "!" level headers
--- Stegi specific stylings ---
--- Text warnings, notices, hilights ---
--- Directory paths ---
--- Calendar specific ---
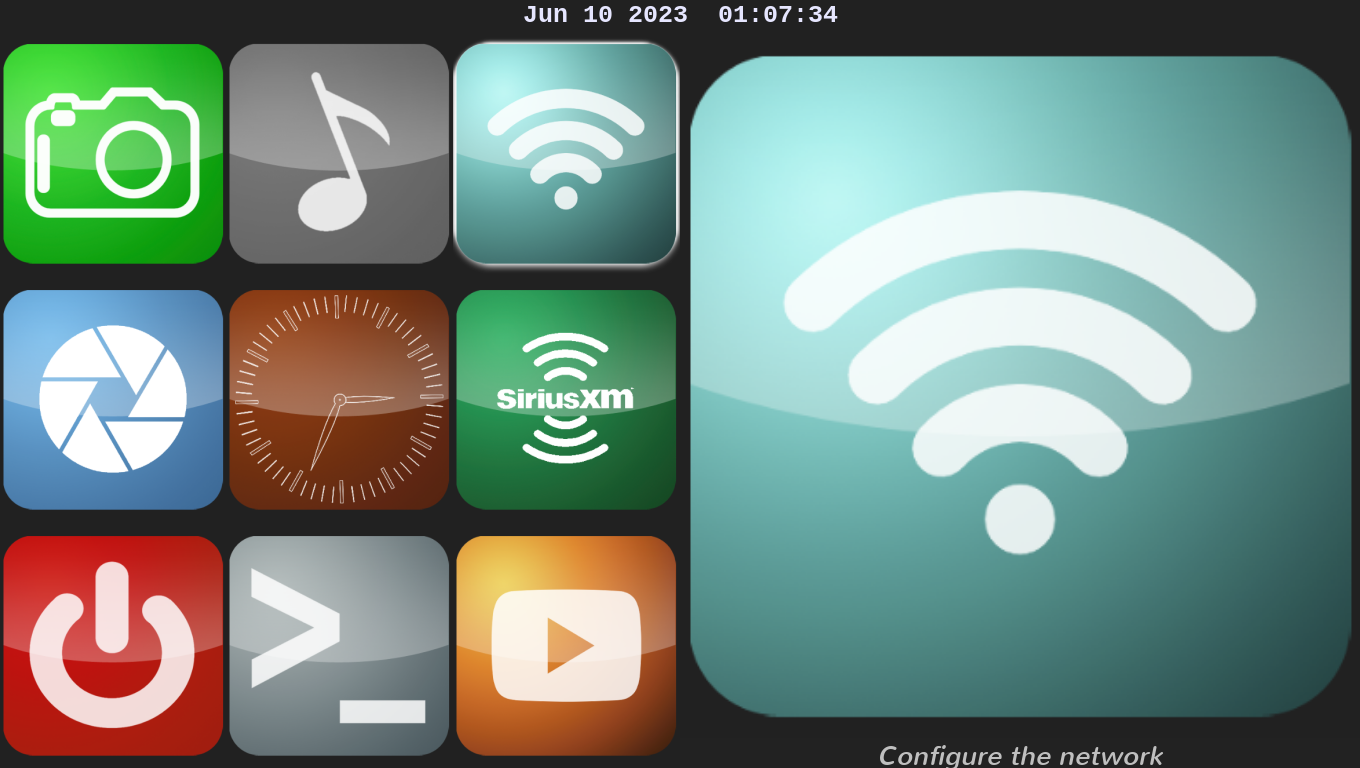
The Player System UI
The Player System is a lightweight companion to the Media System. It is intended to play media files (videos or music) from the local USB ports or over the network from one or more Media Systems.
All Player Systems share their files with other Player and Media Systems on the local network.
|
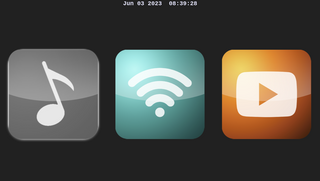
| Figure 1: The PiBox Player System UI
|
The Player System UI displays an app launcher which shows a collection of icons across the display. Each icon displayed in this UI represents a PiBox app. These icons represent the following apps.
| MusicFE - music file browser and player
| Network configuration
| VideoFE - Video file browser and player
|
The icon on the left is selected when the UI is first displayed. The selected icon is highlighted with a small white outline. Hit the ENTER button to start the selected app.
Use the arrow keys on the keyboard to navigate to other icons in the launcher. All apps are designed to return to the launcher by using the ESC key on the keyboard to exit the app.
Network configuration

|
| Figure 2: Network configuration app
|
The first task you should perform is network configuration. If this Media System will not serve files to any other Media or Player Systems then network configuration is not required.
Use the keyboard to navigate to the Network Configuration icon in the launcher, then press ENTER. The Network Configuration application will open. This app provides three tabs at the top, an area for configuration related to the current tab in the center and a status and button bar at the bottom. Navigation in this app is handled by using the TAB key to move to currently visible fields and the Left and Right Arrow keys to change tabs. The field highlight (a white outline) must be on one of the tabs in order to change to a different tab.
The first of the tabs will always be labeled IPV4 for setting an IP address for the device. The second tab will either be labeled Wireless if the device will be configured as a wireless client or Access Point if the device will be configured as a router. The third tab is used to scan the area for available wireless networks.
Note: The Network Configuration application, PNC, will be replaced in the next release with the easier to use PiNet app.
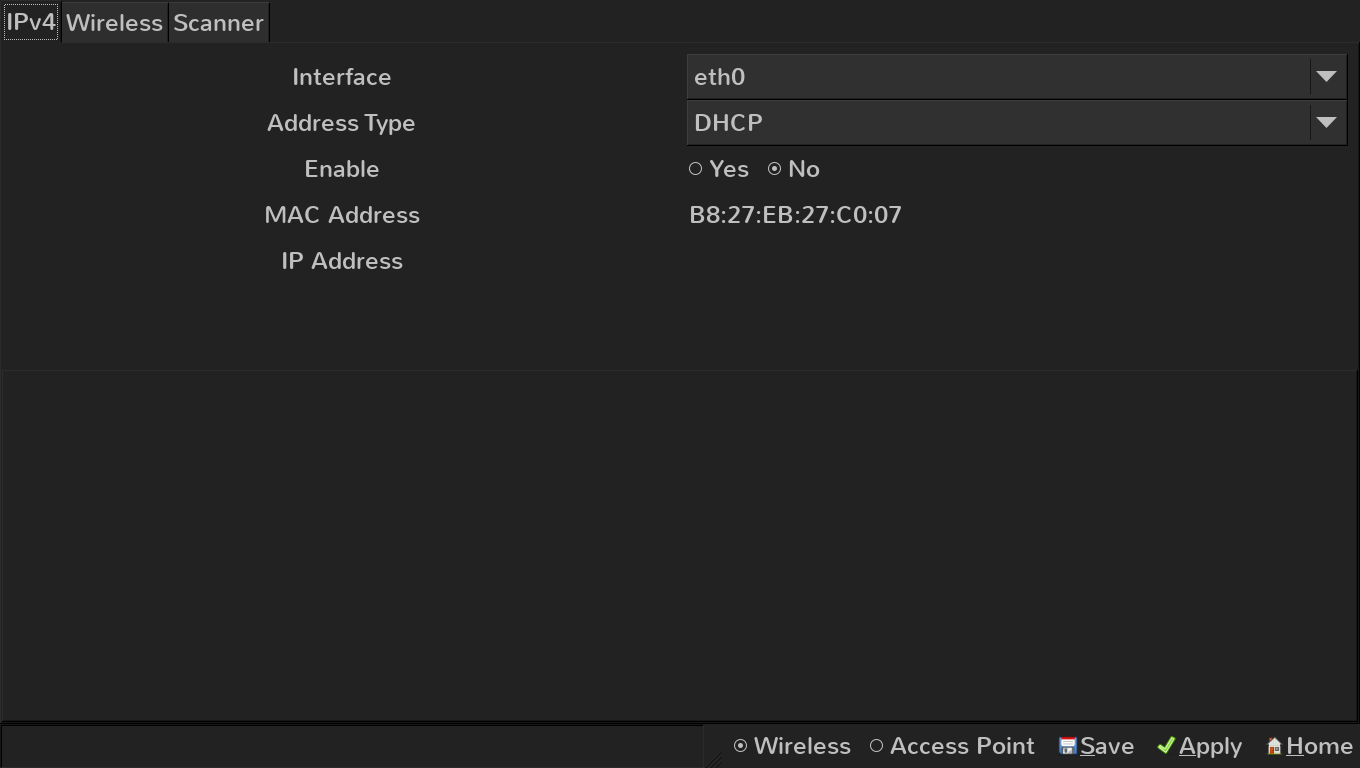
IPV4

|
| Figure 3: IPV4 configuration tab for DHCP
|
This tab allows configuration of the device's IP address for the local network. Select an Interface to configure and choose the
Address Type (DHCP or Static), then Enable the interface. The MAC address for the selected interface is also displayed. If an IP
address is already assigned to the selected interface it will be displayed here and in the status bar at the bottom of the window.
Interface: Set this option to either wlan0 to use a wireless connection or eth0 to use a wired connection. Note that it is assumed this device will be connected wirelessly throughout this document.
Address Type: Set this option to use DHCP if this Media System will operate on an existing wireless network. Set this field to Static to manually configure the interface's IP address. If set to Static additional fields will be displayed in this tab to configure the IP address, Netmask, Gateway, and nameserver.
Enable: This field changes for each Interface, allowing you to use either or both interfaces.
Wireless Client
|
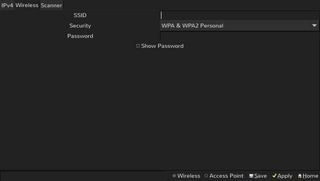
| Figure 4: Wireless client configuration tab
|
This tab allows configuration of the system as a wireless client. There are three fields to configure: SSID, Security and Password.
SSID: This field must contain the name of the wireless network to connect to.
Security: This field must be set to the type of security used by the wireless router. Only WPA2 Personal and WPA2 Enterprise are currently supported.
Password: This field must contain the password used to connect to the wireless router. This field is displayed with asterisks unless the Show Password button is set.
Access Point
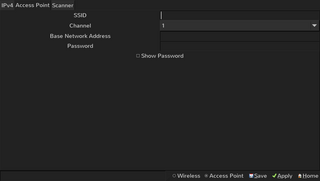
|
| Figure 5: Wireless access point configuration tab
|
This tab allows configuration of the system as a wireless router. This is useful when the Media System will serve files to other
Media Systems on a closed network. There are three fields to configure: SSID, Channel and Password.
SSID: This field must contain the name of the wireless network this router will provide. The network name is not broadcast.
Channel: Use the up and down arrow keys on the keyboard to select a channel from 1 to 14. Use the Scanner tab to look for channels that have the least traffic to avoid poor network throughput.
Password: This field must contain the password that wireless clients must use to connect to this router.
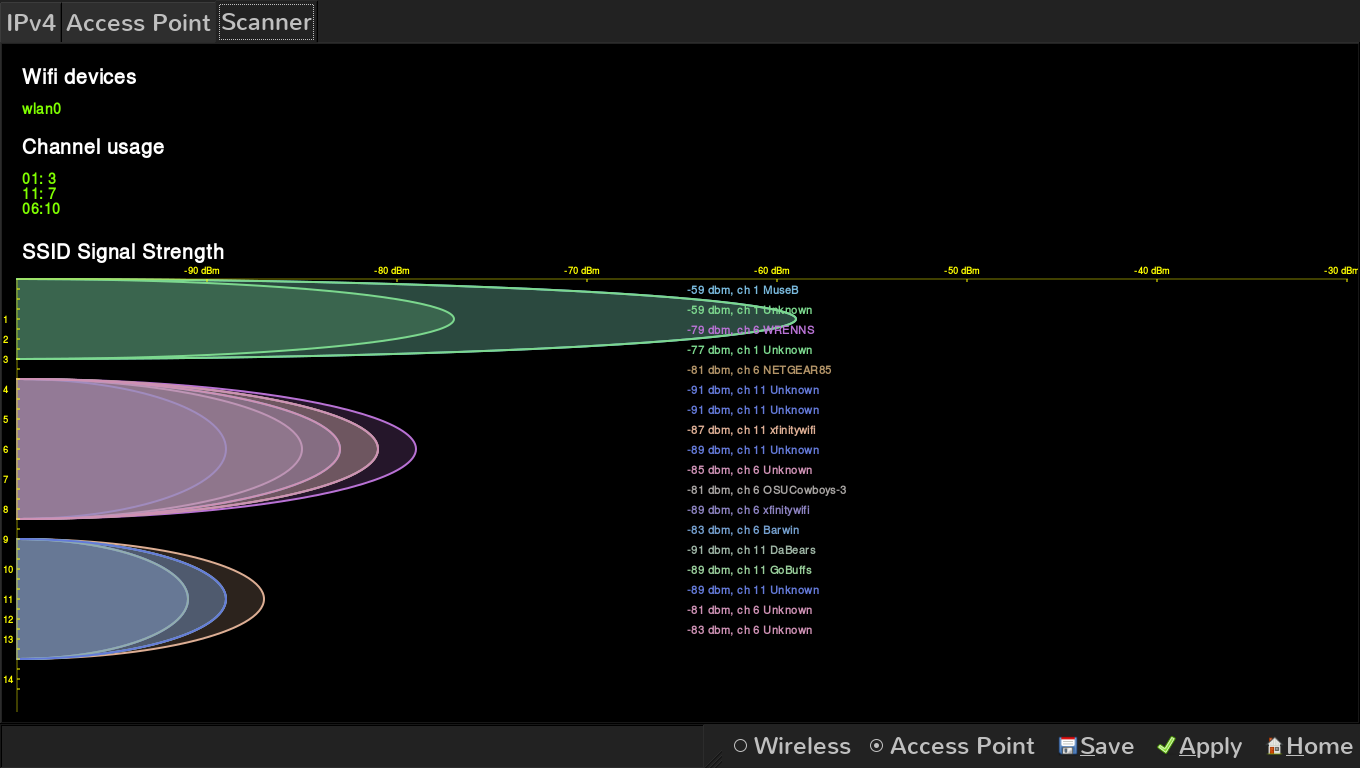
Wireless Scanner
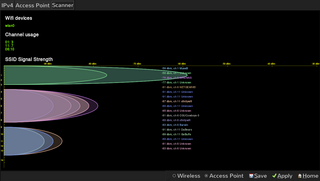
|
| Figure 6: Wireless scanner tab
|
This tab shows wireless activity in the vicinity of the Media System. It can be used to choose a channel with the least possible interference by nearby wireless network.
Status and Button Bar
The lower left of the display will show the current IP address of the Media System if the device is currenty configured and properly connected to a network. The lower right displays two buttons: Wireless and Access Point. Select Wireless if this device will be connected as a wireless client on a network. Select Access Point if this device will act as a router for a local network. Only one of these two options can be active.
Next to these two options are three buttons: Save, Apply and Home. The Save button should be used to save the current configuration. Saving a configuration applies only to the currently displayed tab. The Apply button will restart the Media System network software using the currently saved configurations. The Home button has the same effect as pressing the ESC key which will retun you to the app launcher.
MusicFE Music File Browser and Player
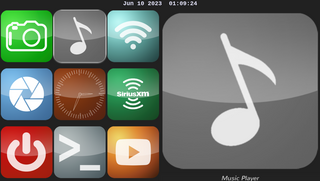
|
| Figure 7: MusicFE music file browser and player
|
The MusicFE application scans directories under /media/usb to find music files in MP3 format. Those files are scanned for ID3Tag data to create a database of music. This is done at application start time. A database does not need to be created manually (as it does with the VideoFE application). To add music to the database simply insert another USB stick with music files to the Media System. The application must be restarted to scan new music files.
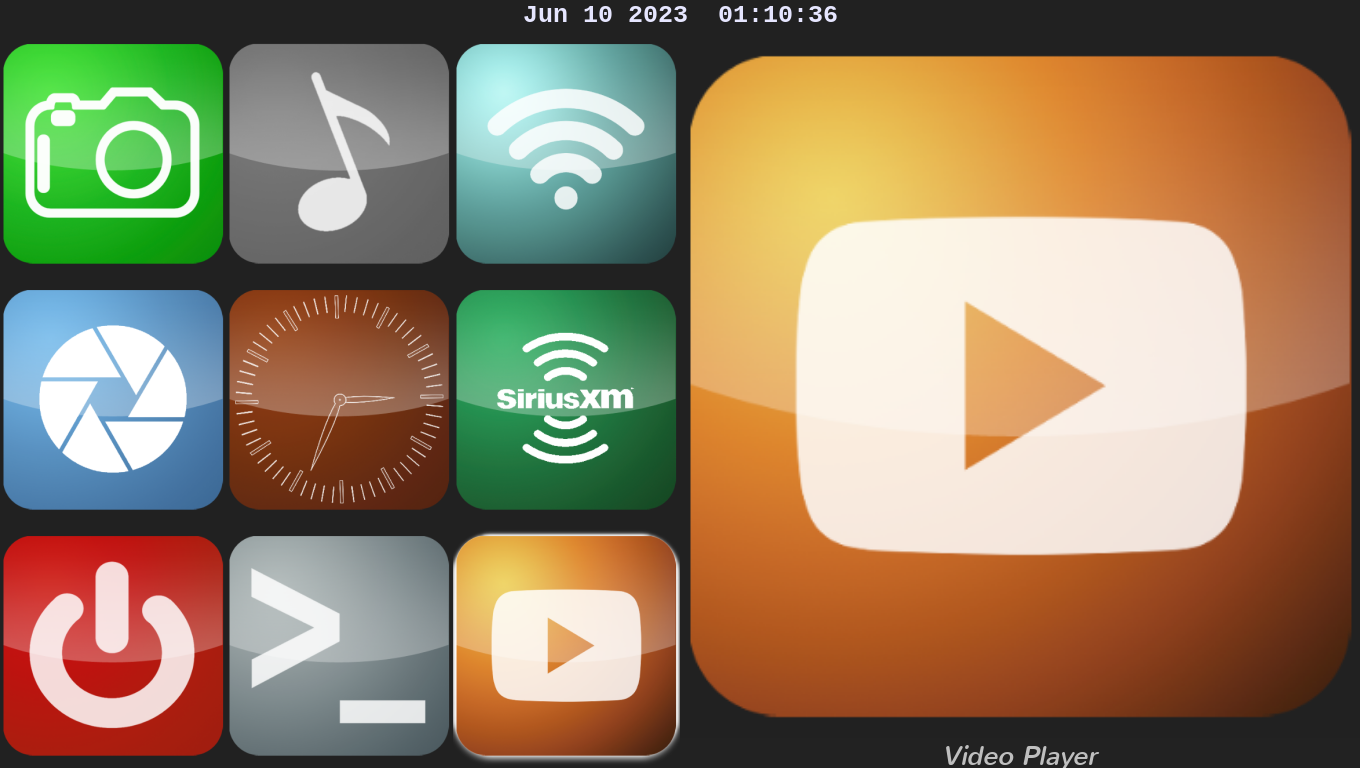
VideoFE Video File Browser and Player
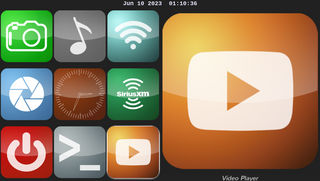
|
| Figure 8: VideoFE UI
|
VideoFE allows selection and playback of videos. It reads databases generated by the VideoLib desktop application from directories under /media/usb, which is where any USB stick will show up in the file system. Additionally, if other Media Systems are found on the network they will export their video file directories. These files will also show up under the /media directory tree where the local Media System will find them.
The VideoFE video file browser and player is a front end to the Raspberry Pi omxplayer utility. This means VideoFE can play any video format supported by omxplayer, which in turn uses ffmpeg and supports a wide variety of video file formats.
Omxplayer is fed the filename of the selected video and starts playing. If the user chooses to exit the video then omxplayer is notified to stop the video and the user is returned to the video selection screen.
If no videos are listed in any tab of VideoFE then the app could not find any video libraries on the inserted media sticks or on exported media sticks from other PiBox devices. If this happens, make sure the media stick has the database file from the VideoLib application in the top level directory of that stick, reinsert the stick and restart the app.

|
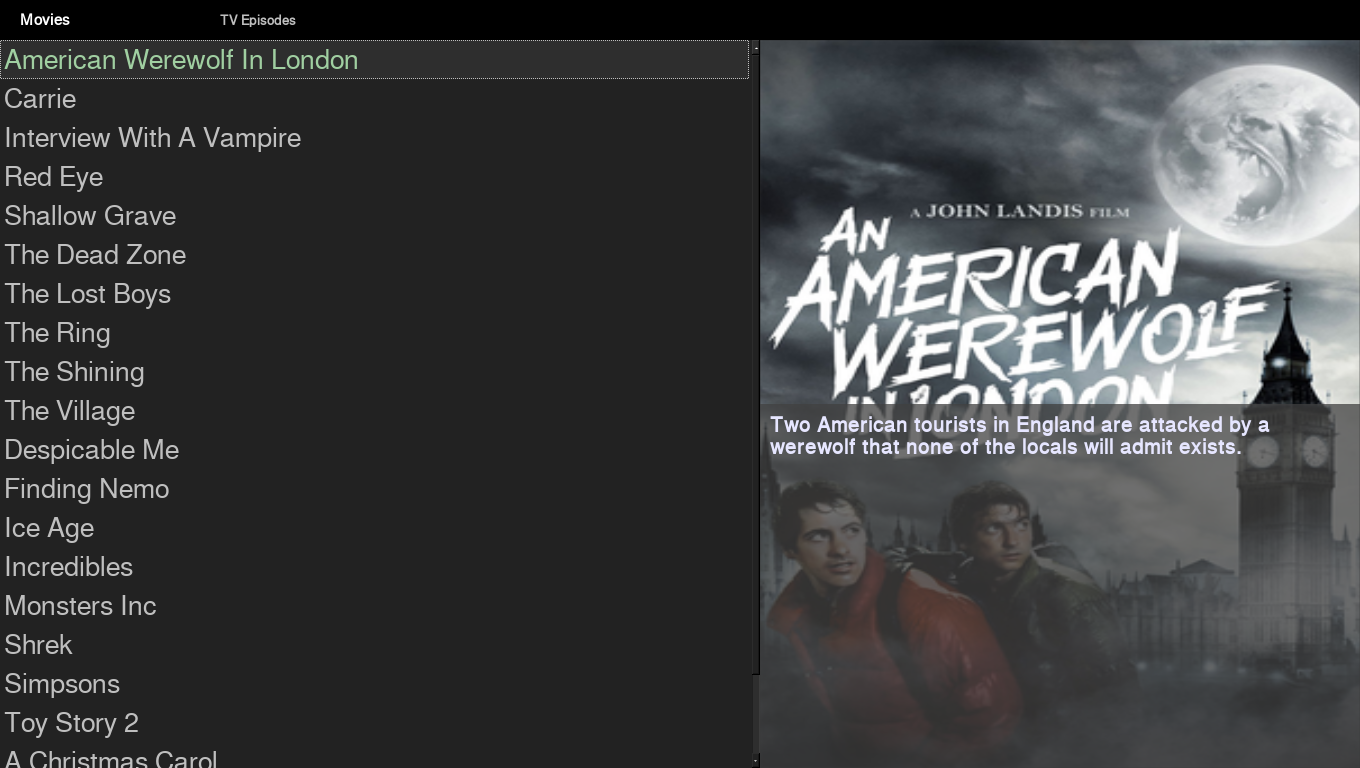
| Figure 9: VideoFE movies list
|
There are two tabs in the video selection screen. The first is for movies, the second is for TV Episodes. Use the TAB key to move from Movies to TV Episodes and back. In either mode a list of available videos is displayed. Use the up and down arrow keys on the keyboard to move through the list. Alternatively, type of few characters of a video title and hit the ENTER key. The first matching video will be highlighted. If there is no match then the first video title is highlighted. Using the ENTER key will play the highlighted video as long as you are searching for video titles.
Each movie title has a banner image associated with it. The banner is displayed on the right with a descriptive text overlayed on the bottom half of the image.

|
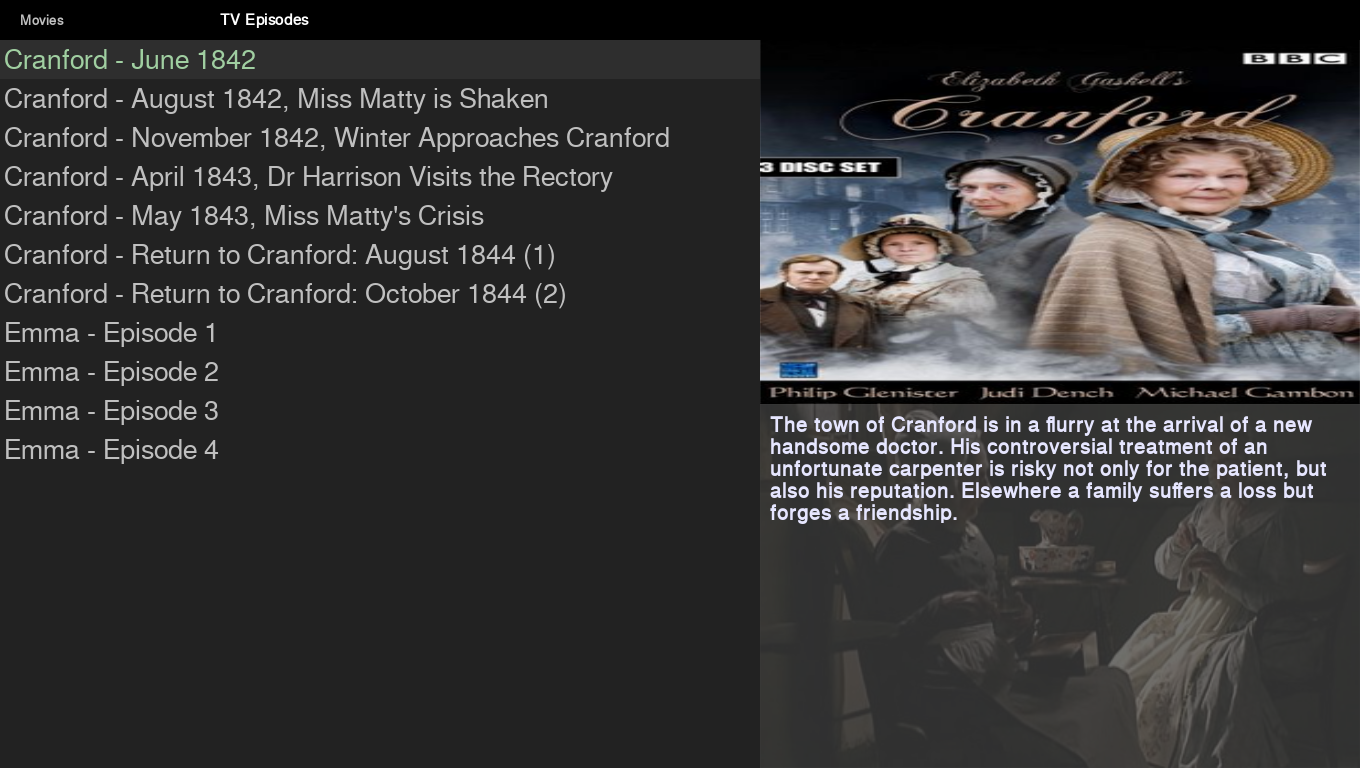
| Figure 10: VideoFE TV Episode list
|
Each TV title has a series image and an episode image associated with it. The banner is displayed on the top right while the episode image is displayed on the bottom left with a descriptive text overlayed on it.
Once a video starts to play they keyboard forward and back keys can be used to skip forward and back. To exit a video use the ESC key.